InGateway501 Quick Start Manual
This document is used to explain the basic configuration operations of InGateway501 (IG501 for short) networking, software version update, etc., so that users can master the basic configuration of IG501 and the use of common functions.
- 1. Configure IG501 Network Parameters
- 2. Update the Software
- 3. Python Edge Computing
- 4. Device Manager
- Appendix
1. Configure IG501 Network Parameters
1.1 Access the IG501
Step 1: Set the PC’s IP address to be on the same subnet with FE 0/1. By default, the IP address of FE 0/1 on IG501 is 192.168.1.1.
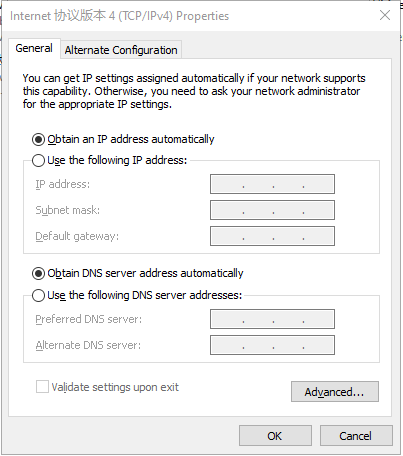
Method 1: Enable the PC to obtain an IP address automatically (recommended)
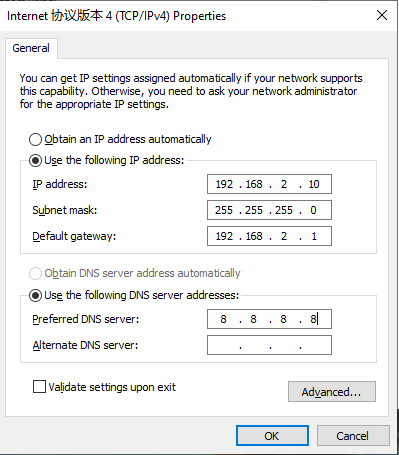
Method 2: Set a fixed IP address
Select Use the following IP address, enter an IP address (By default,any from 192.168.1.2 to 192.168.1.254), subnet mask (By default,255.255.255.0), default gateway (By default,192.168.1.1), and DNS server address, and click OK.
Step 2: Launch the browser on the PC and access the IP address of FE 0/1. Enter the login user name and password. The default user name and password are adm and 123456 respectively.
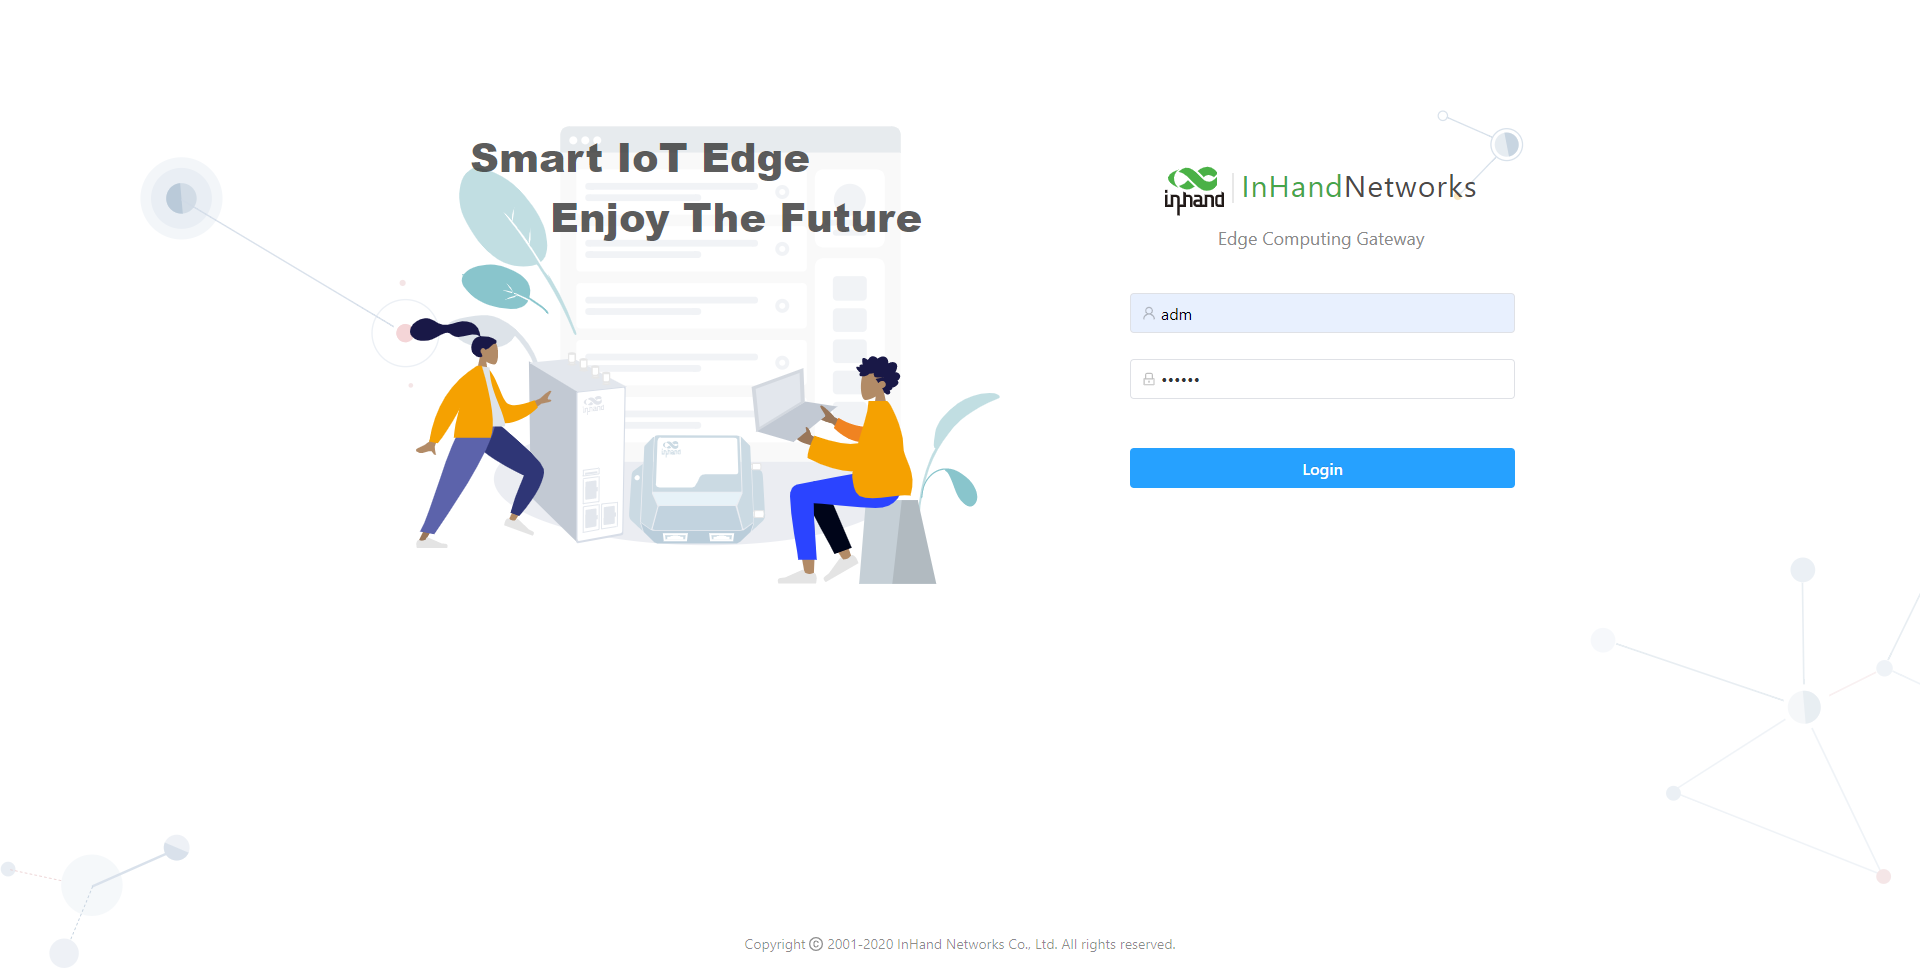
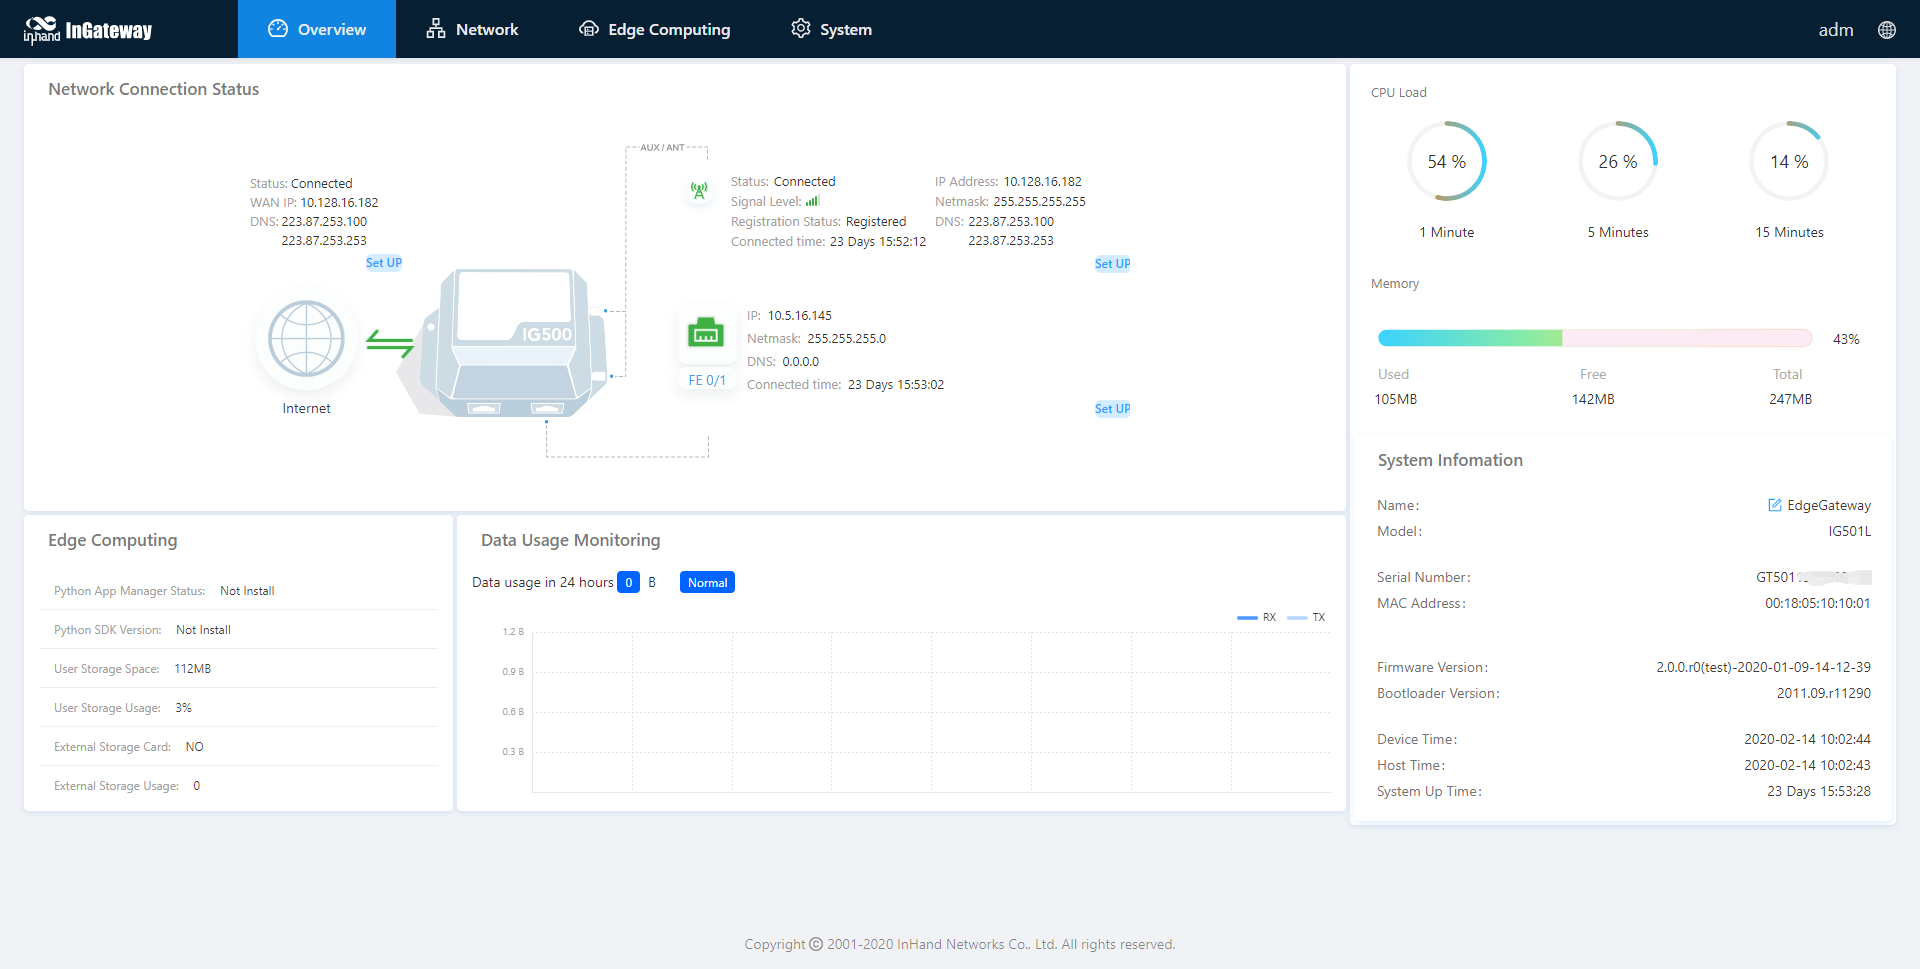
Step 3: After successful login, you can see the web page as shown below:
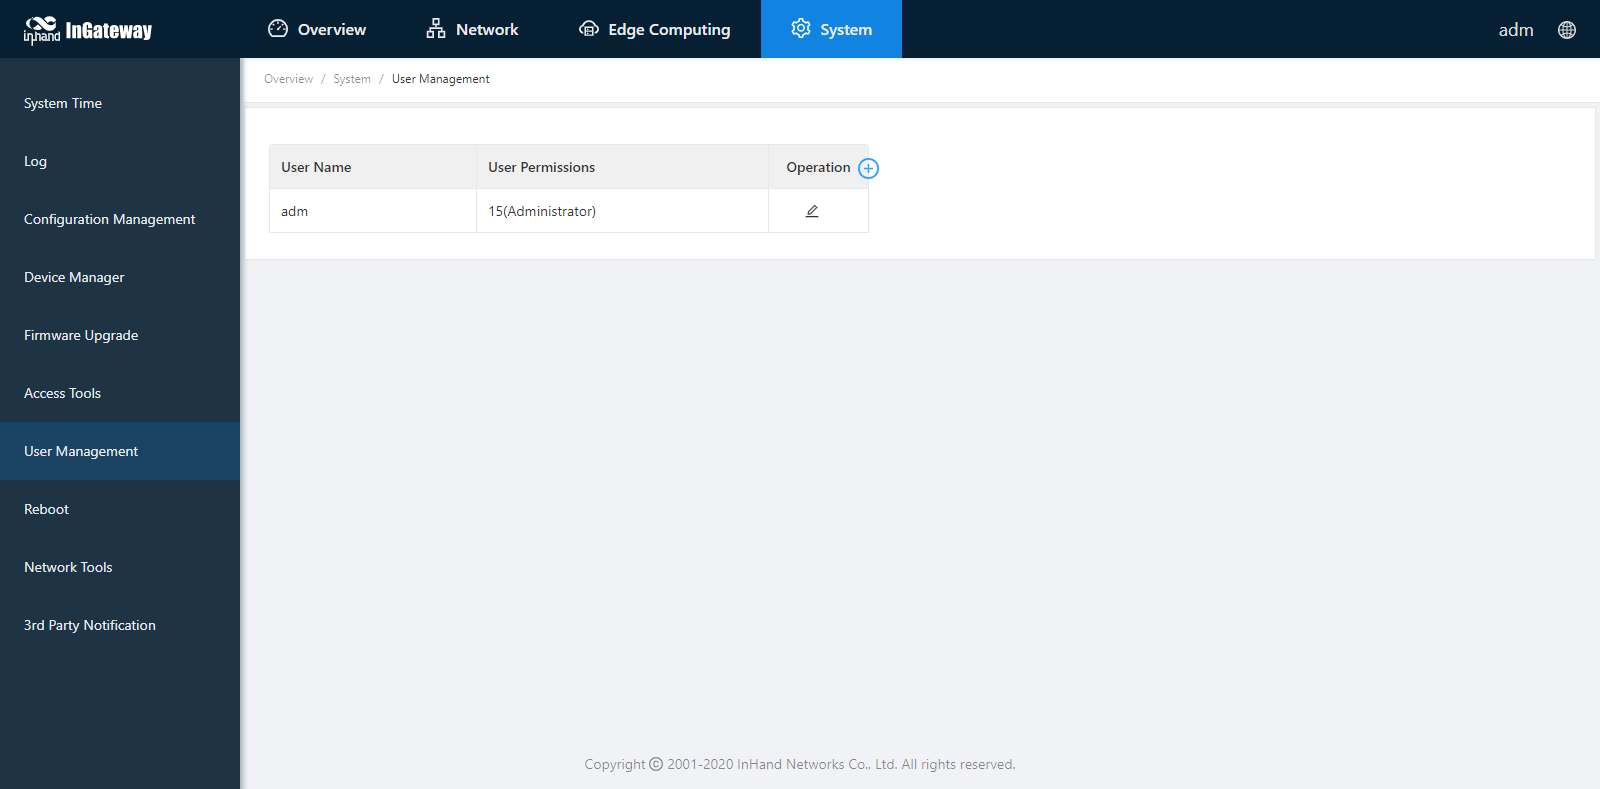
Step 4: To change the user name and password for logging in to the web management interface of IG501, choose System > User Management page of IG501 and set the new user name and password.
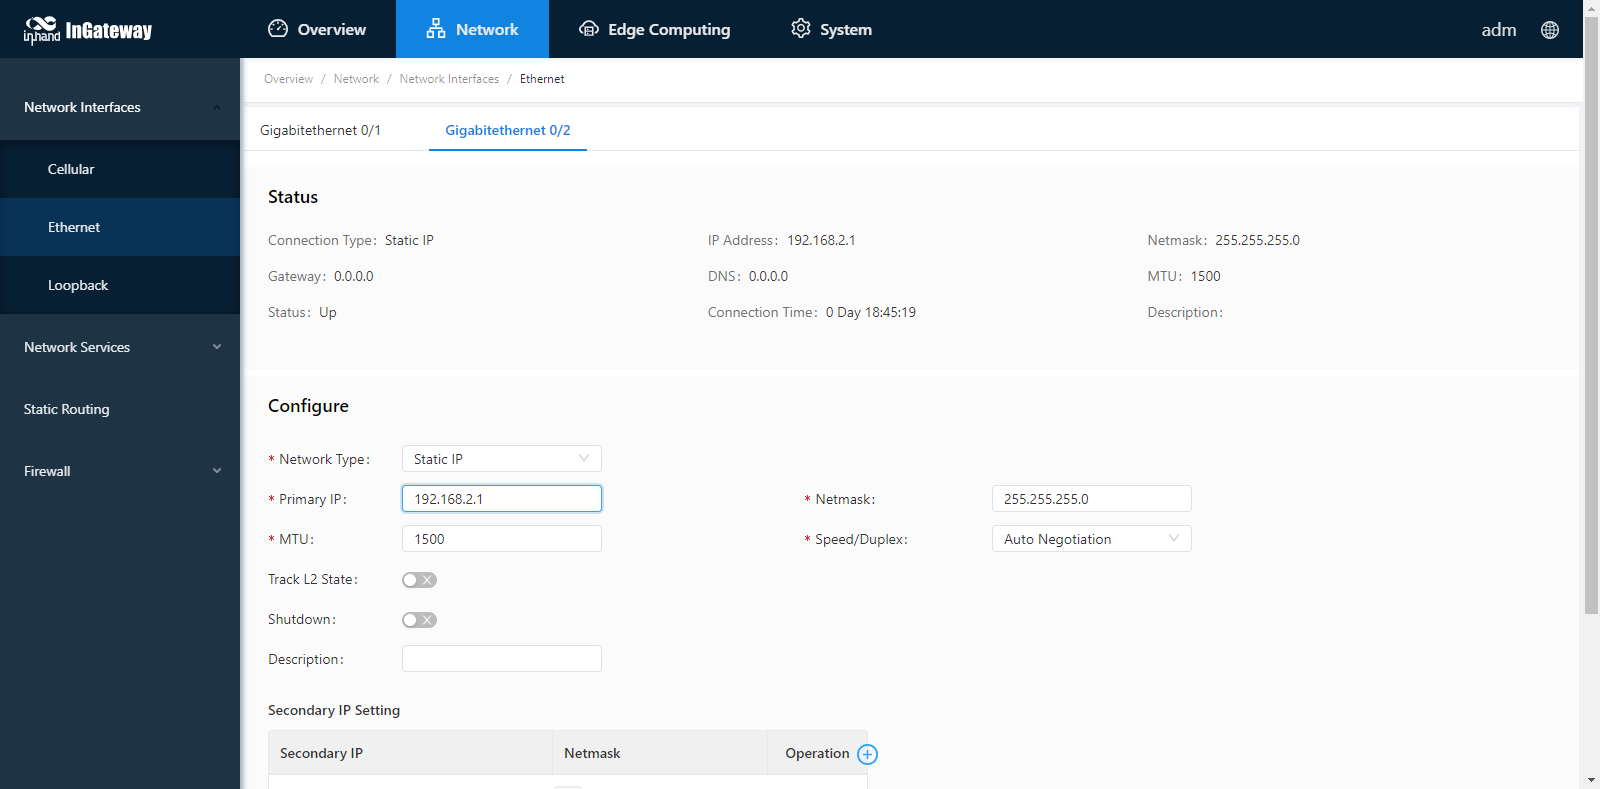
Step 5: To change the IP address of FE 0/1, choose Network > Network Interfaces > Ethernet page of IG501 to configure FE 0/1.
1.2 Connect IG501 to the Internet
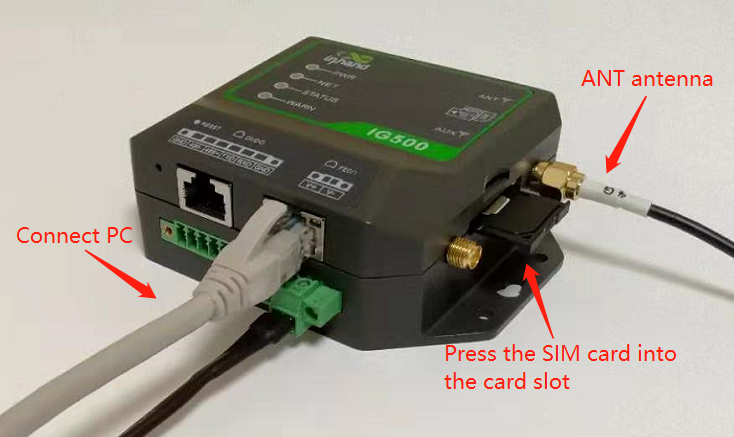
Step 1: Insert the SIM card. (Note: Before inserting or removing the SIM card, unplug the power cable; otherwise, the operation may cause data loss or damage the IG501.) After inserting the SIM card, connect the 4G LTE antenna to the ANT interface and power on the IG501.
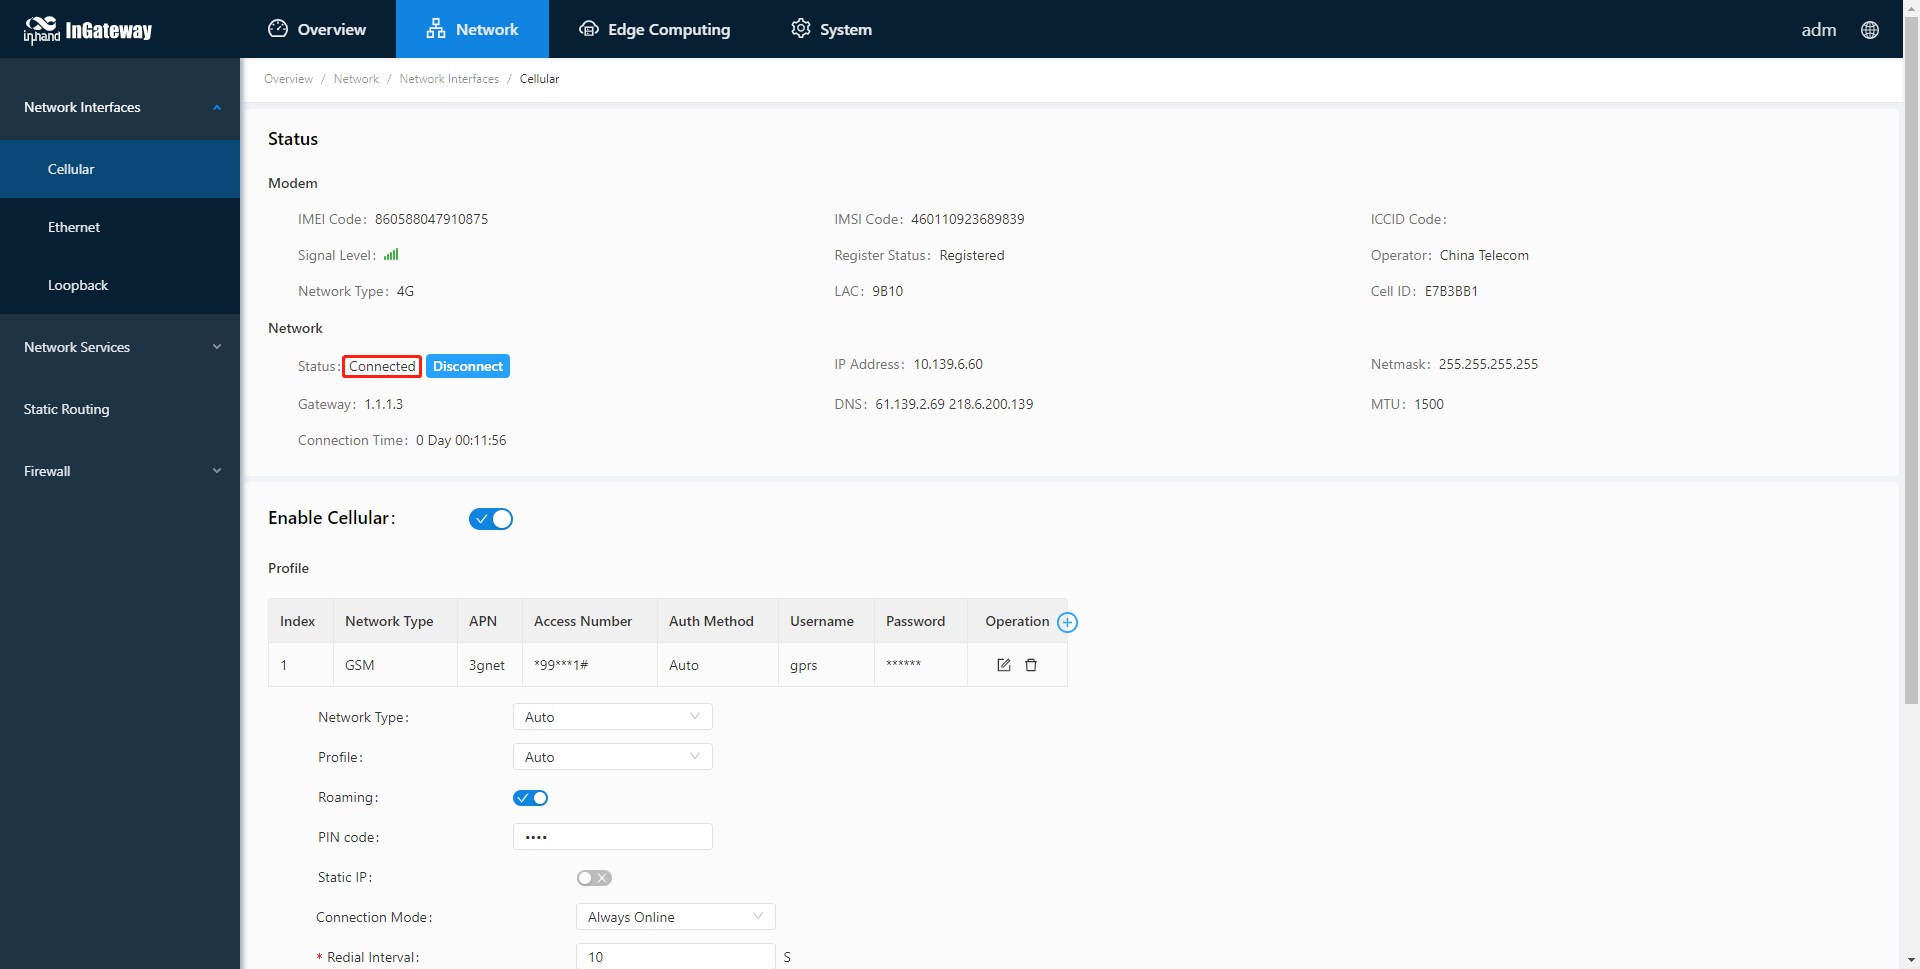
Step 2: Choose Network > Network Interfaces > Cellular and select Enable Cellular.
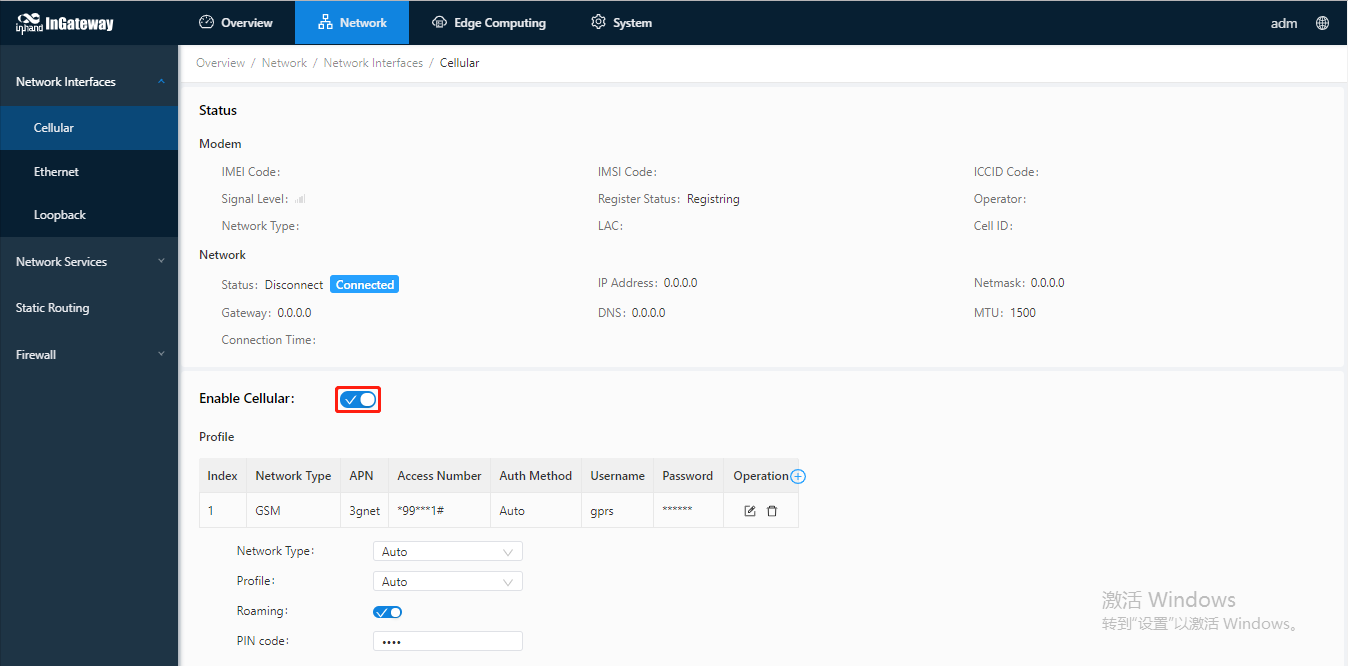
When the network connection status is Connected and an IP address has been allocated, the IG501 has been connected to the Internet with the SIM card.
2. Update the Software
To obtain the latest software version of IG501 and updated functions, contact the customer service center. To update the IG501 software version, do as follows.
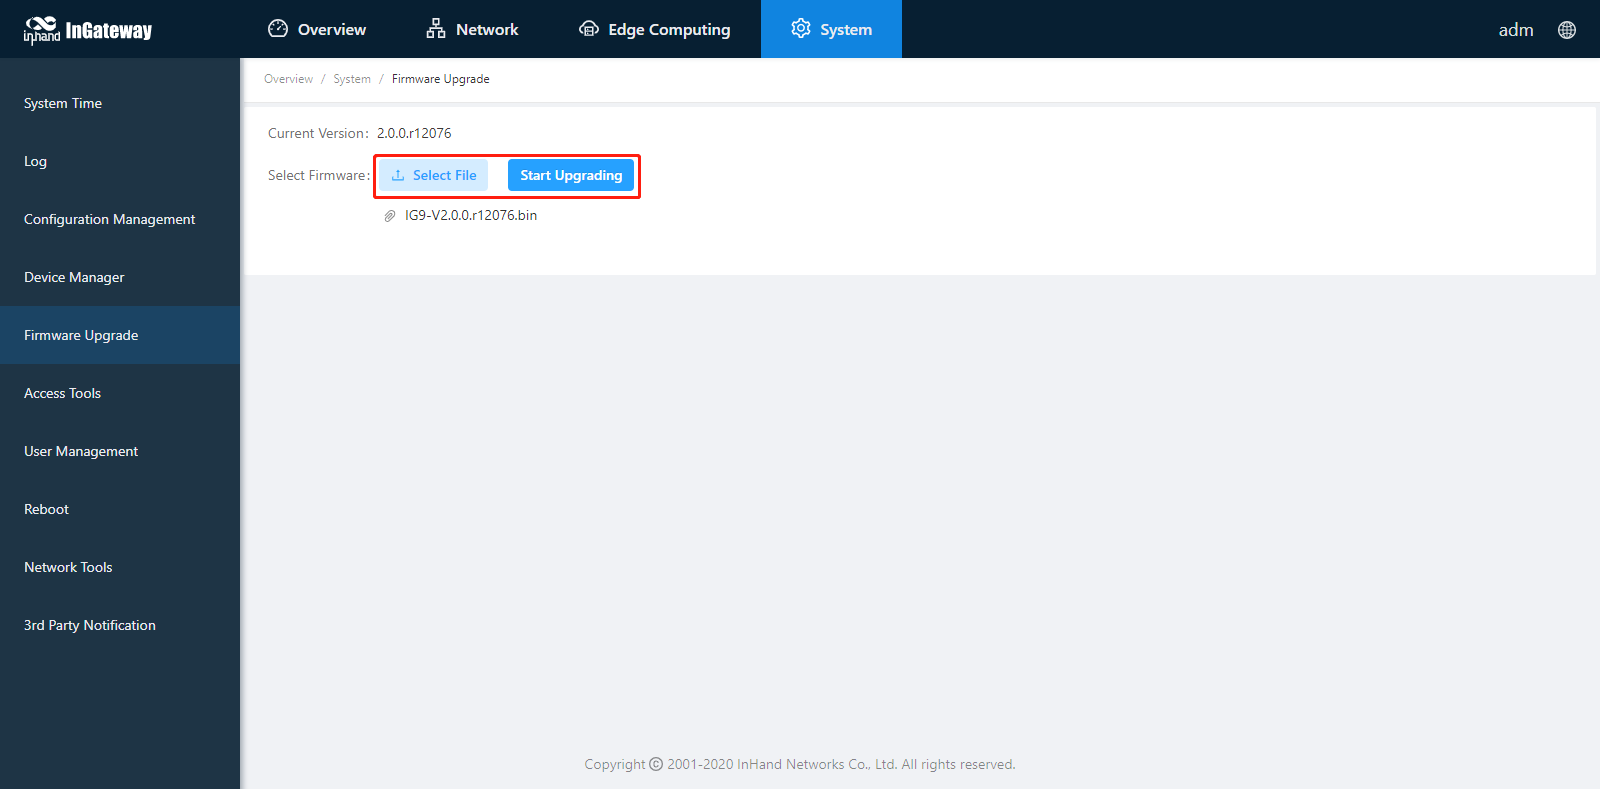
2.1 Update the IG501 firmware.
Choose System > Firmware Upgrade. Select a firmware file and click Start Upgrading. After the update is completed, you are prompted to restart the system to Apply the new firmware.
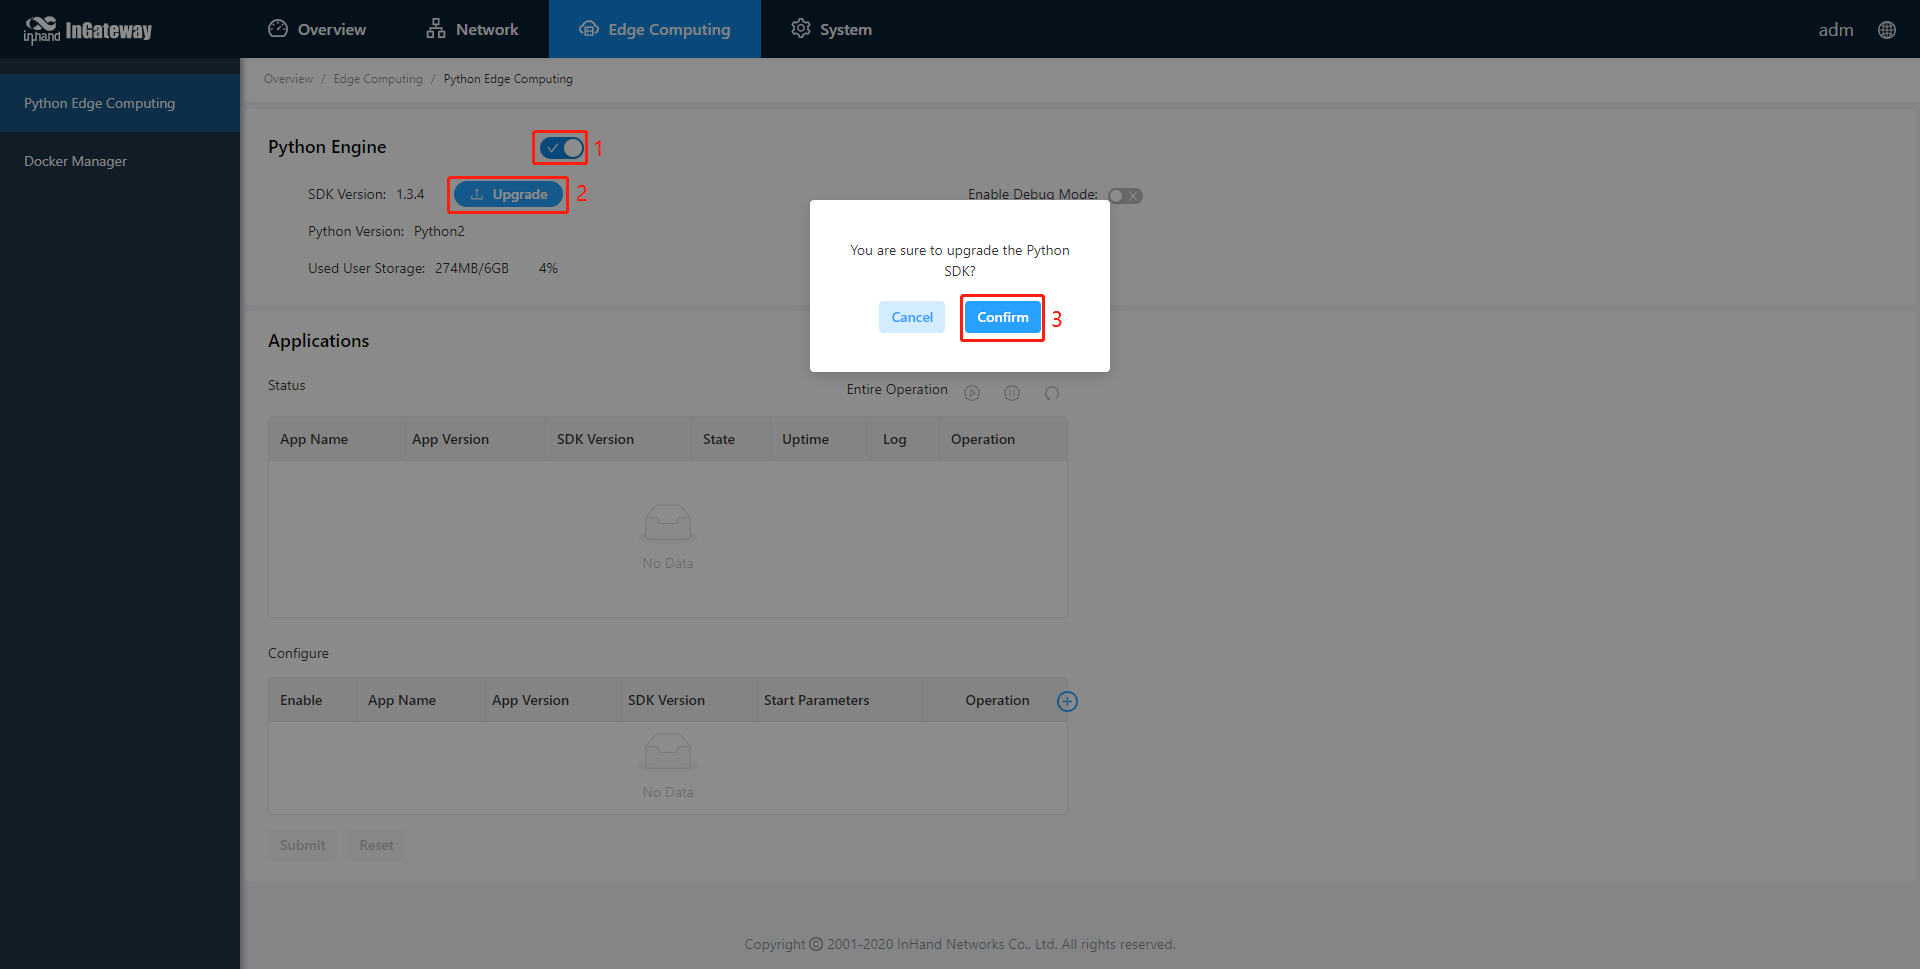
2.2 Upgrade the Python SDK of IG501.
Choose Edge Computing > Python Edge Computing. Select Python Engine, select an Python SDK file, and click Upgrade; when the upgrade confirmation window pops up, click Confirm. Then the IG501 automatically performs the upgrade.
3. Python Edge Computing
3.1 Install and run Python App
To install and run Python App (App for short) in IG501, please refer to the following process:
Step 1: Install the App
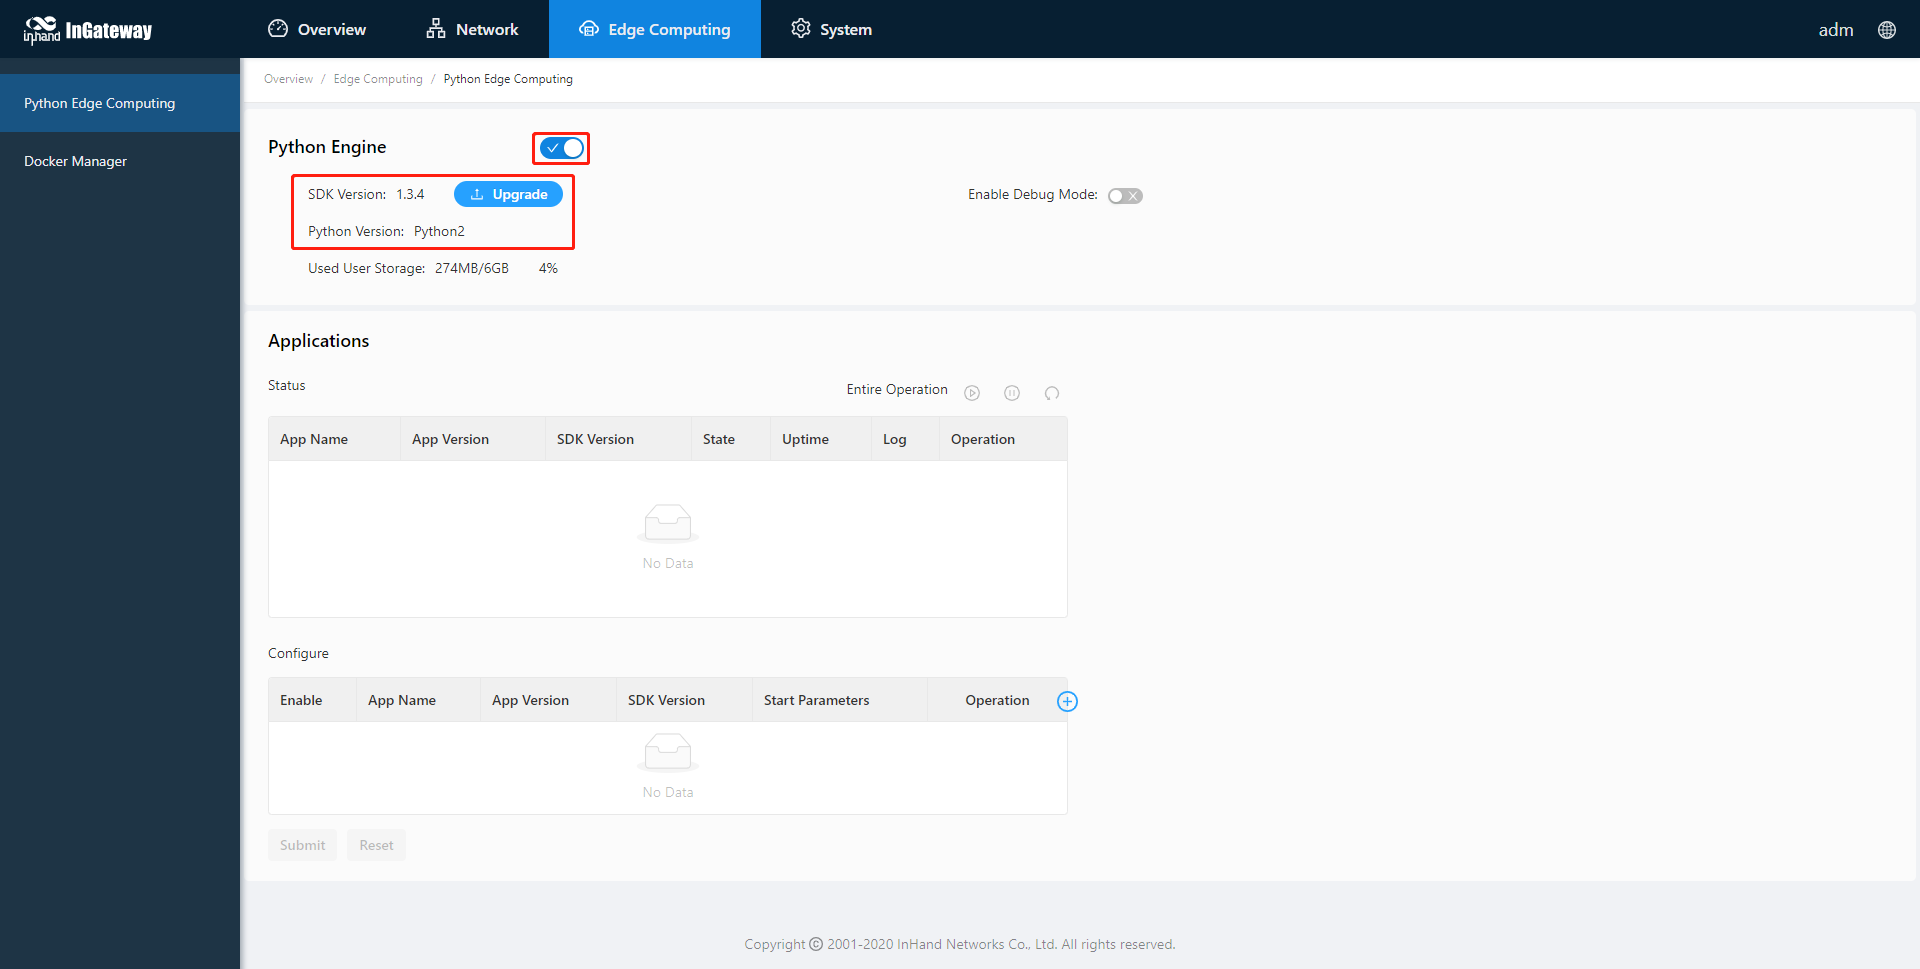
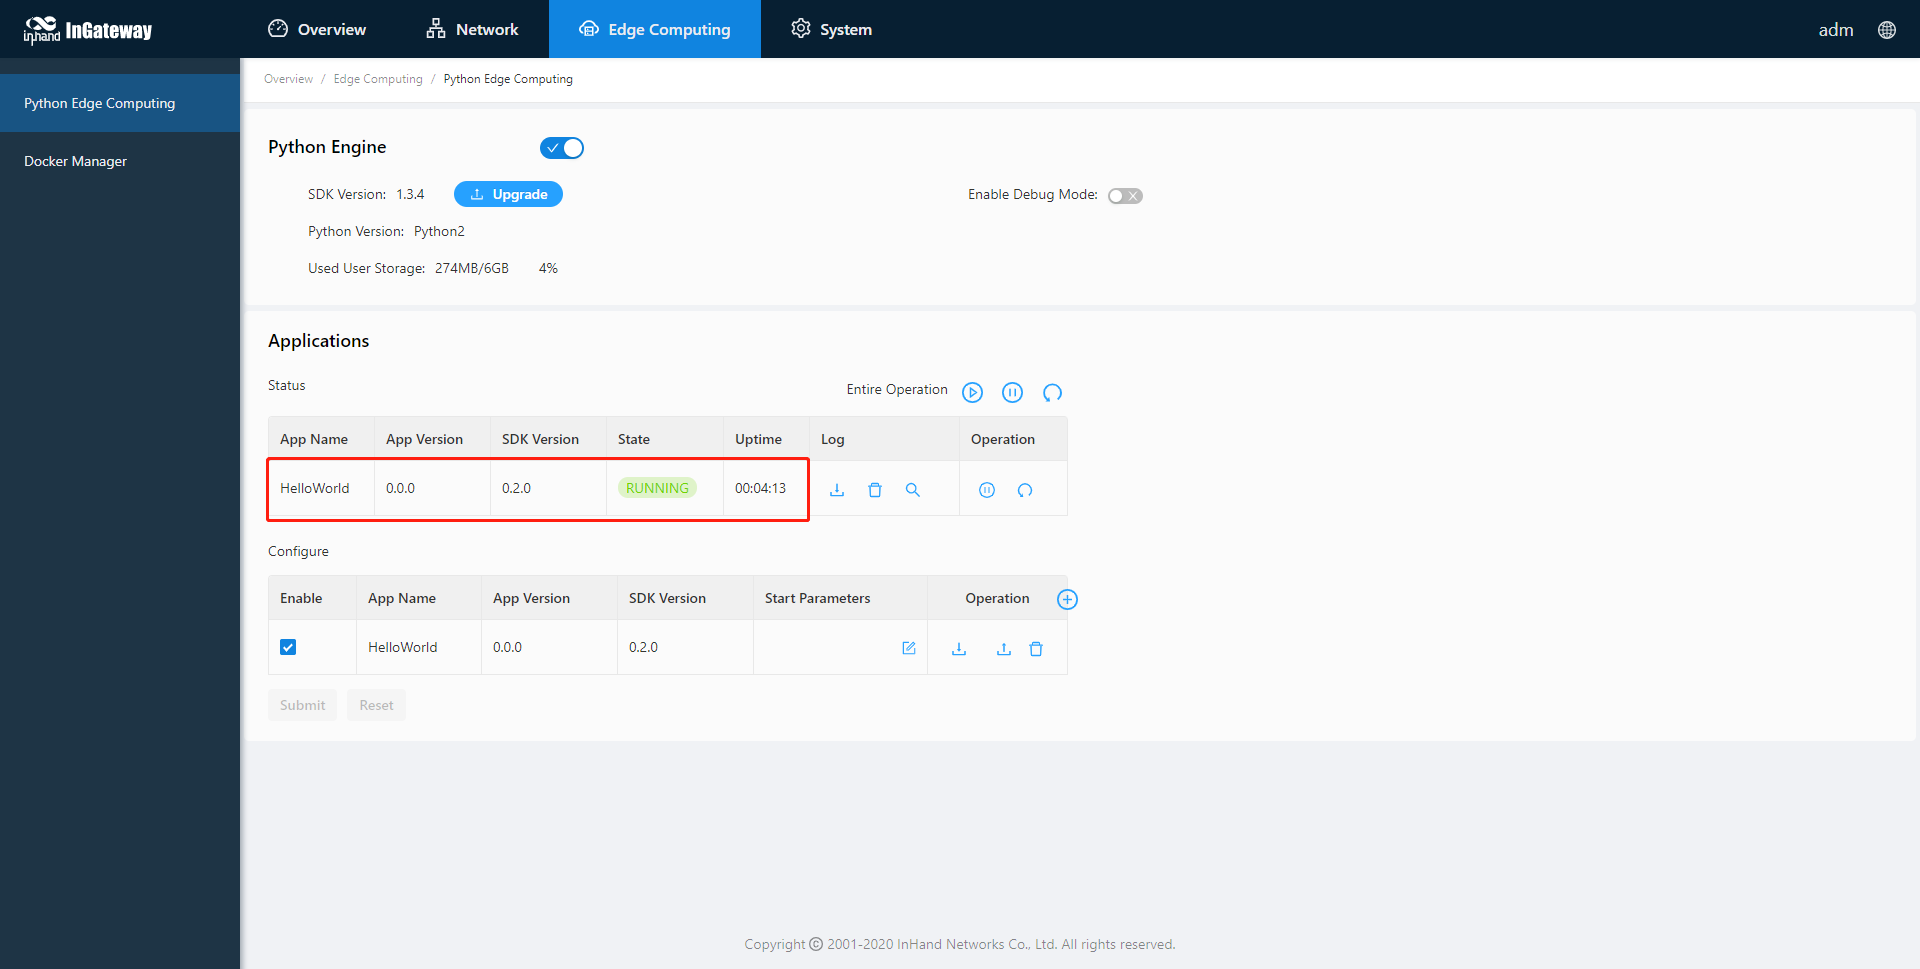
Before installing the App, you need to ensure that the Python Edge Computing Engine is enabled and the Python SDK is installed, as shown in the following figure:
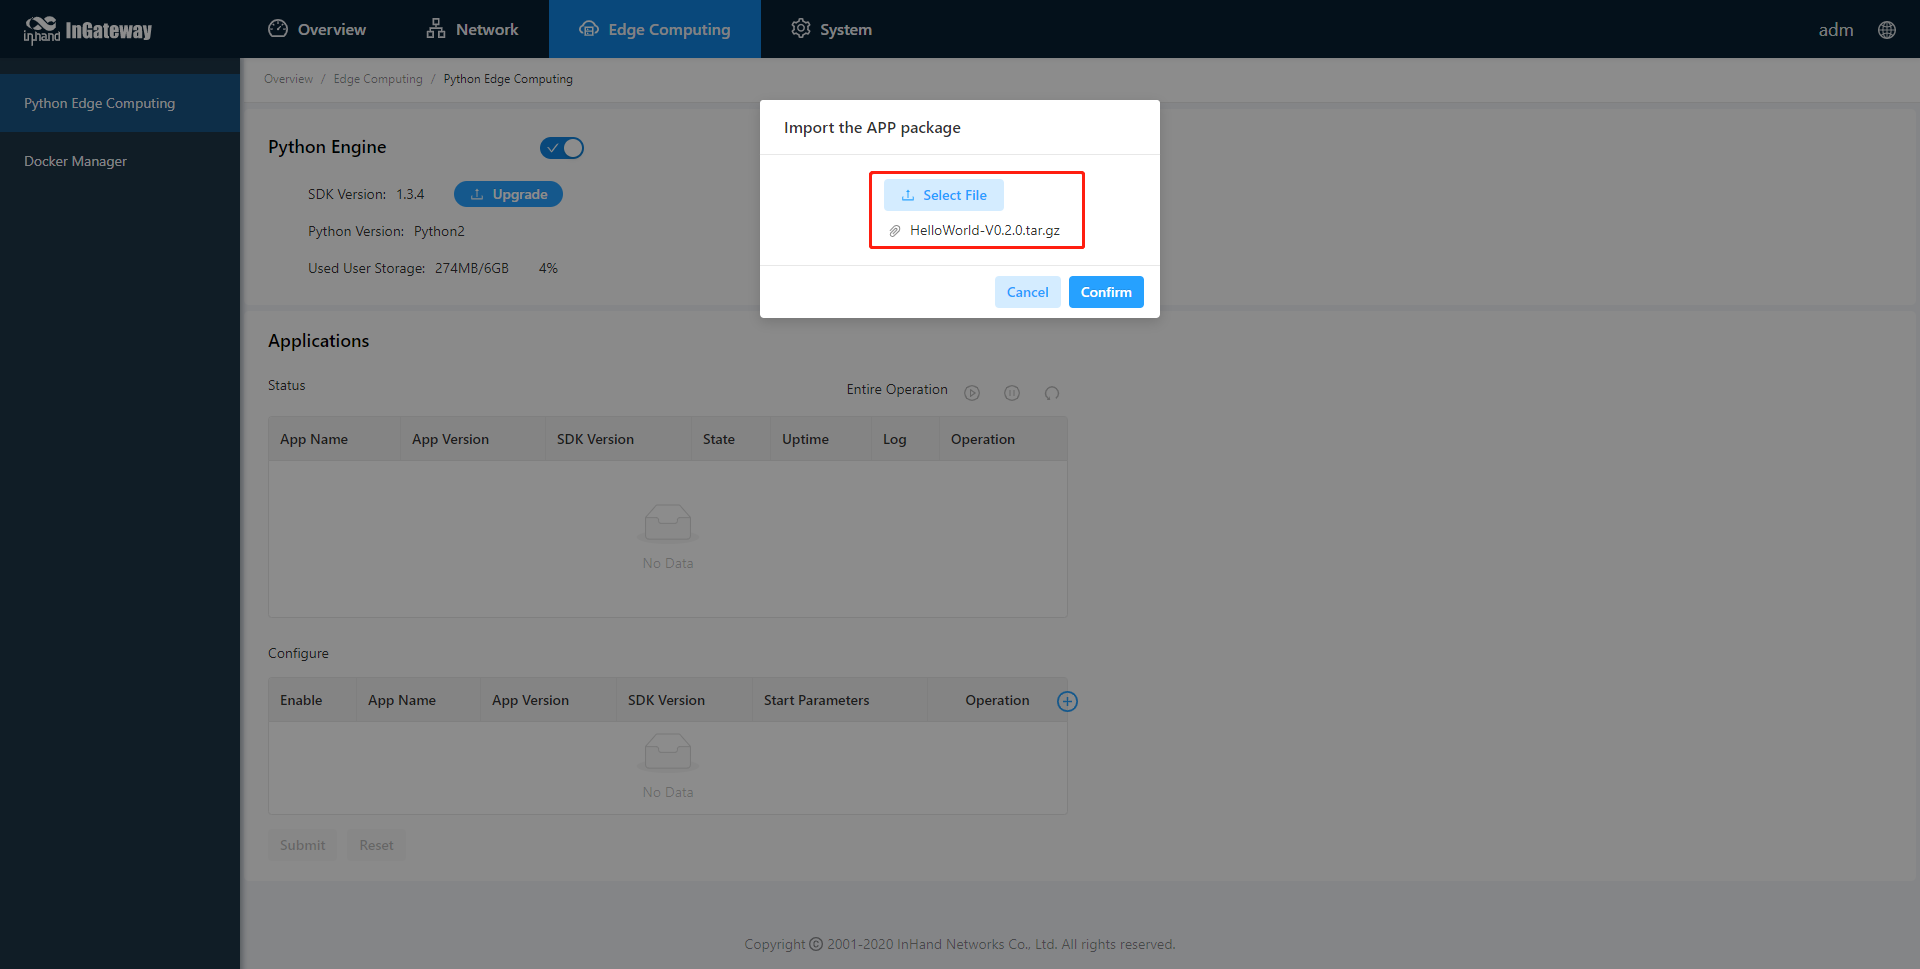
Choose Edge Computing > Python Edge Computing. click the Add button and select the App package file to be installed, then click OK.
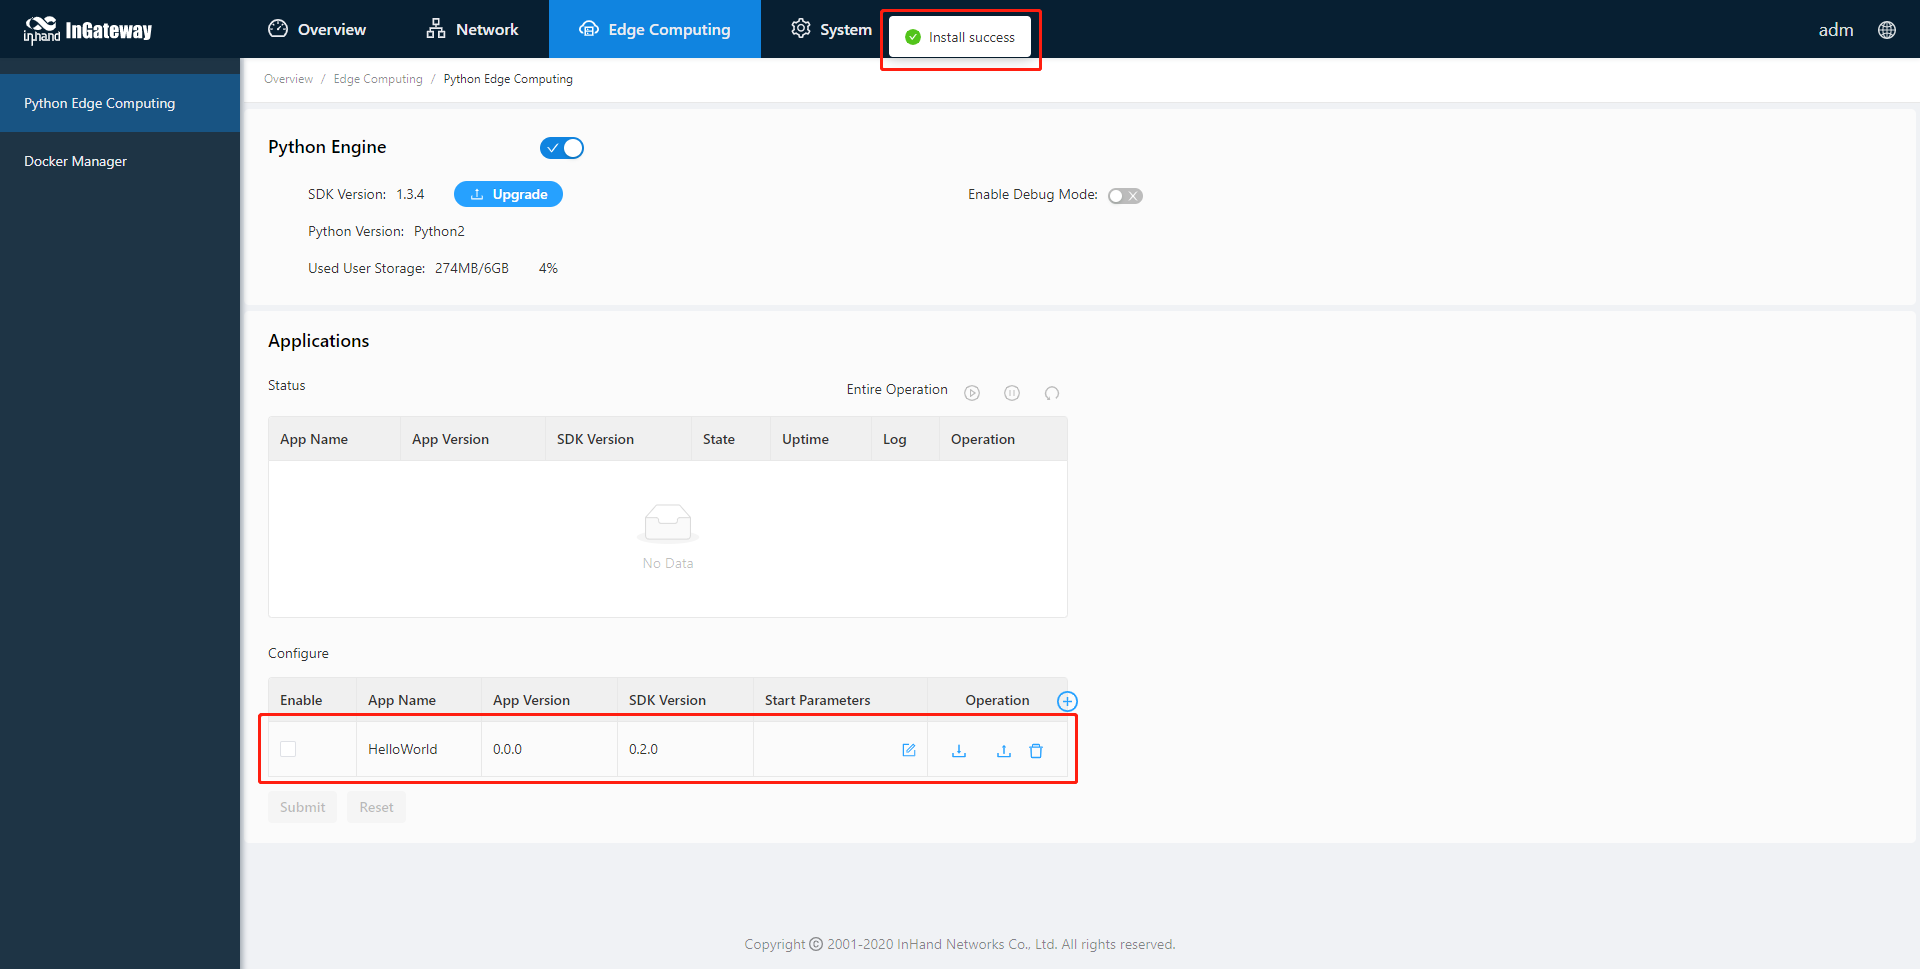
After importing, you can view the imported Apps, as shown in the following figure:
Step 2: Run the App
Select enable App and click Submit.
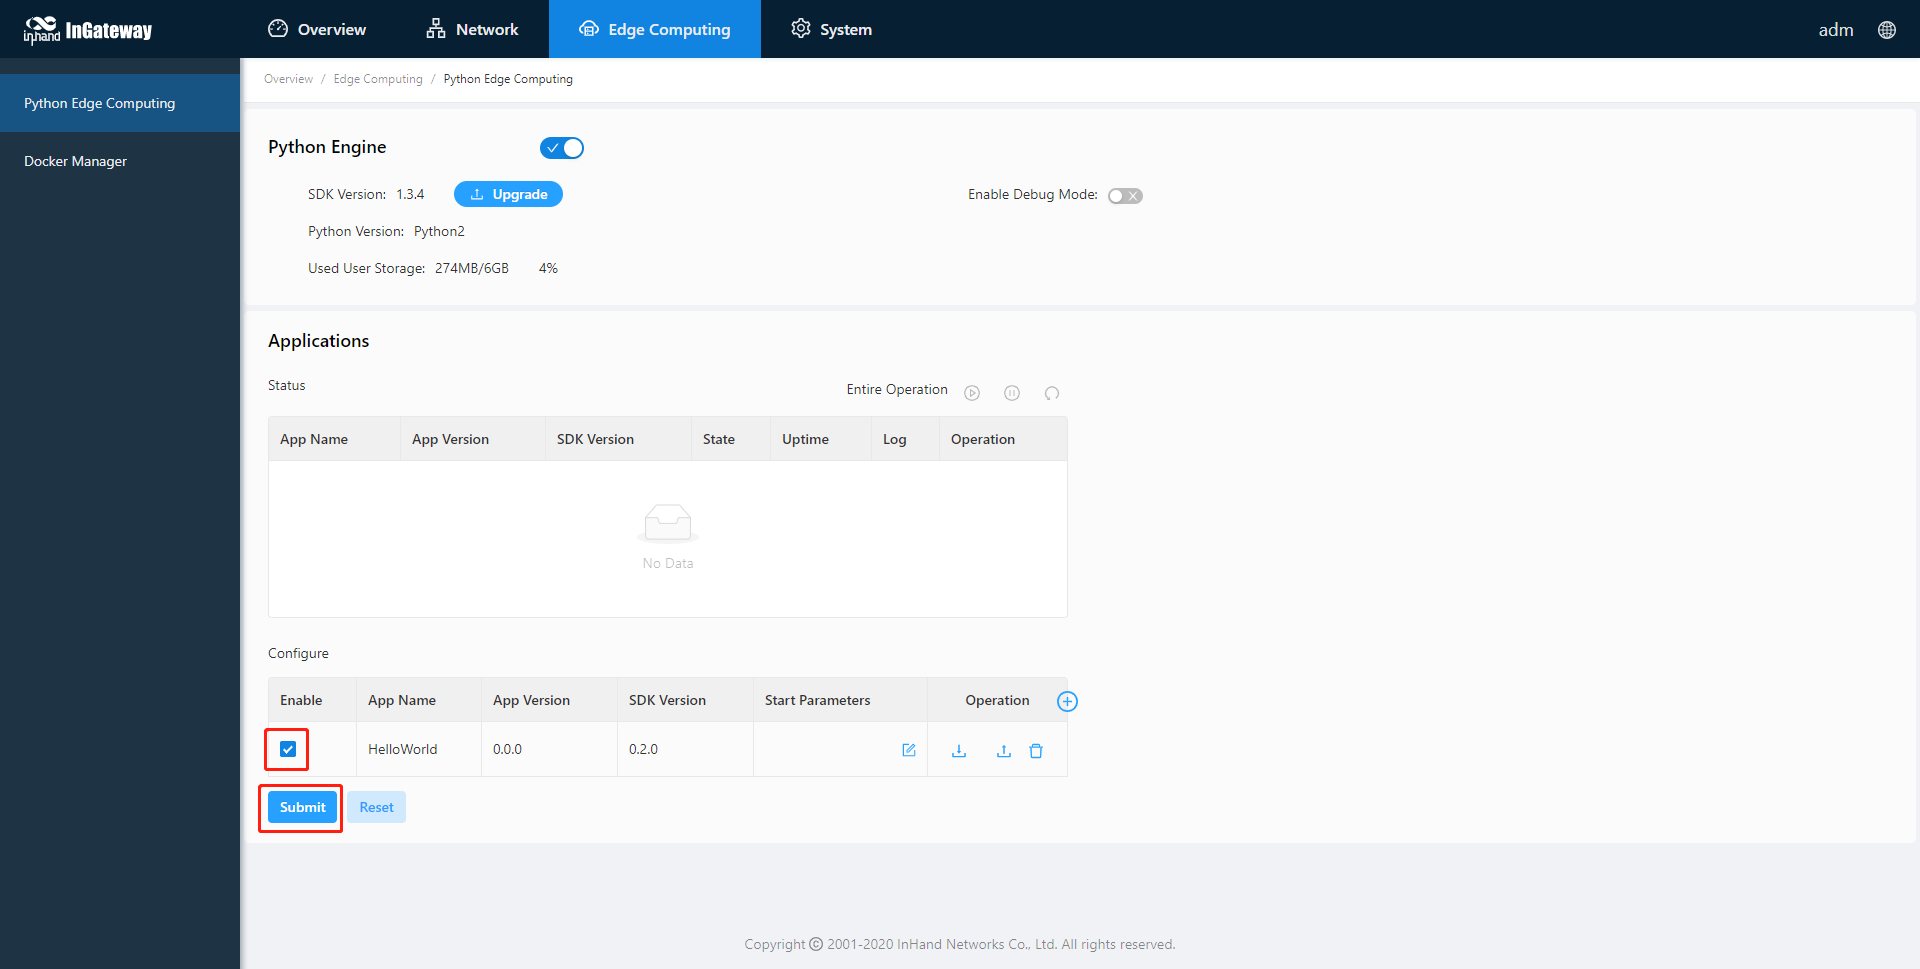
Once enabled, the App automatically runs and will run every time the IG501 is started.
3.2 Update Configuration File for App
If the installed App supports importing configuration files to modify the running mode, you can update the App running configuration by referring to the following process:
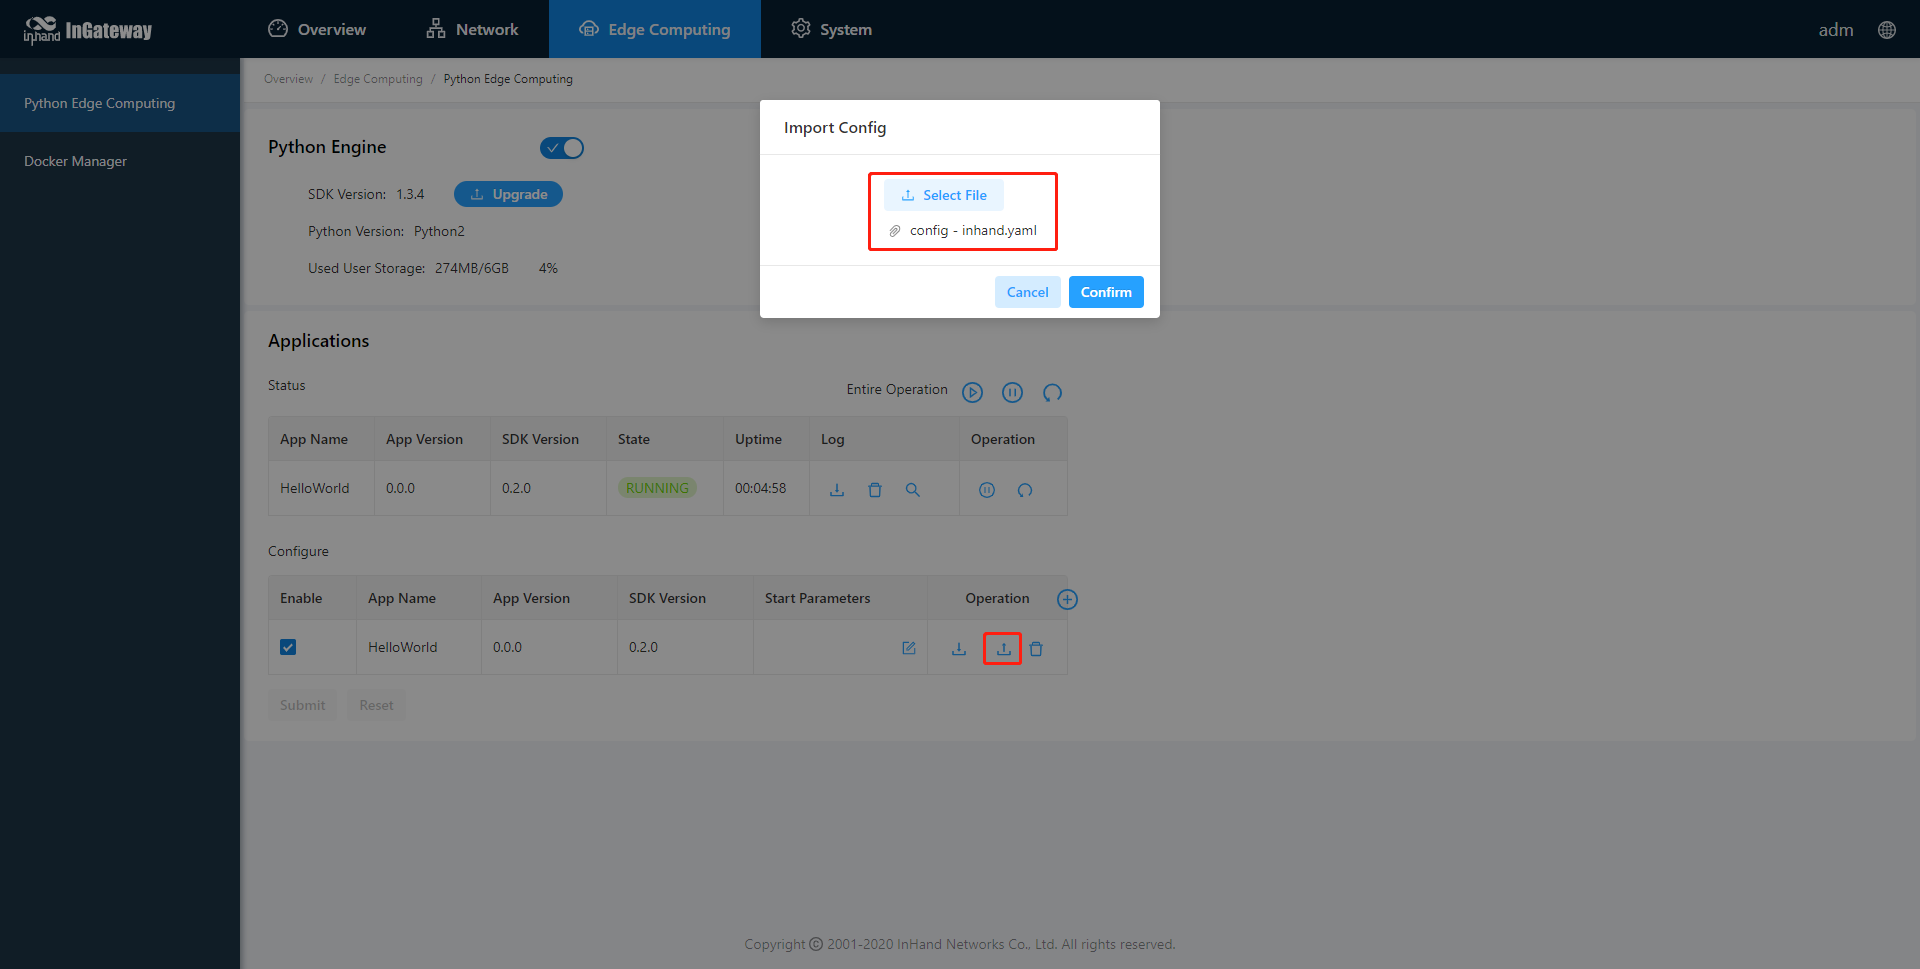
Step 1: Choose Edge Computing > Python Edge Computing, click the Import Configuration button and select the configuration file to be imported, then click Confirm.
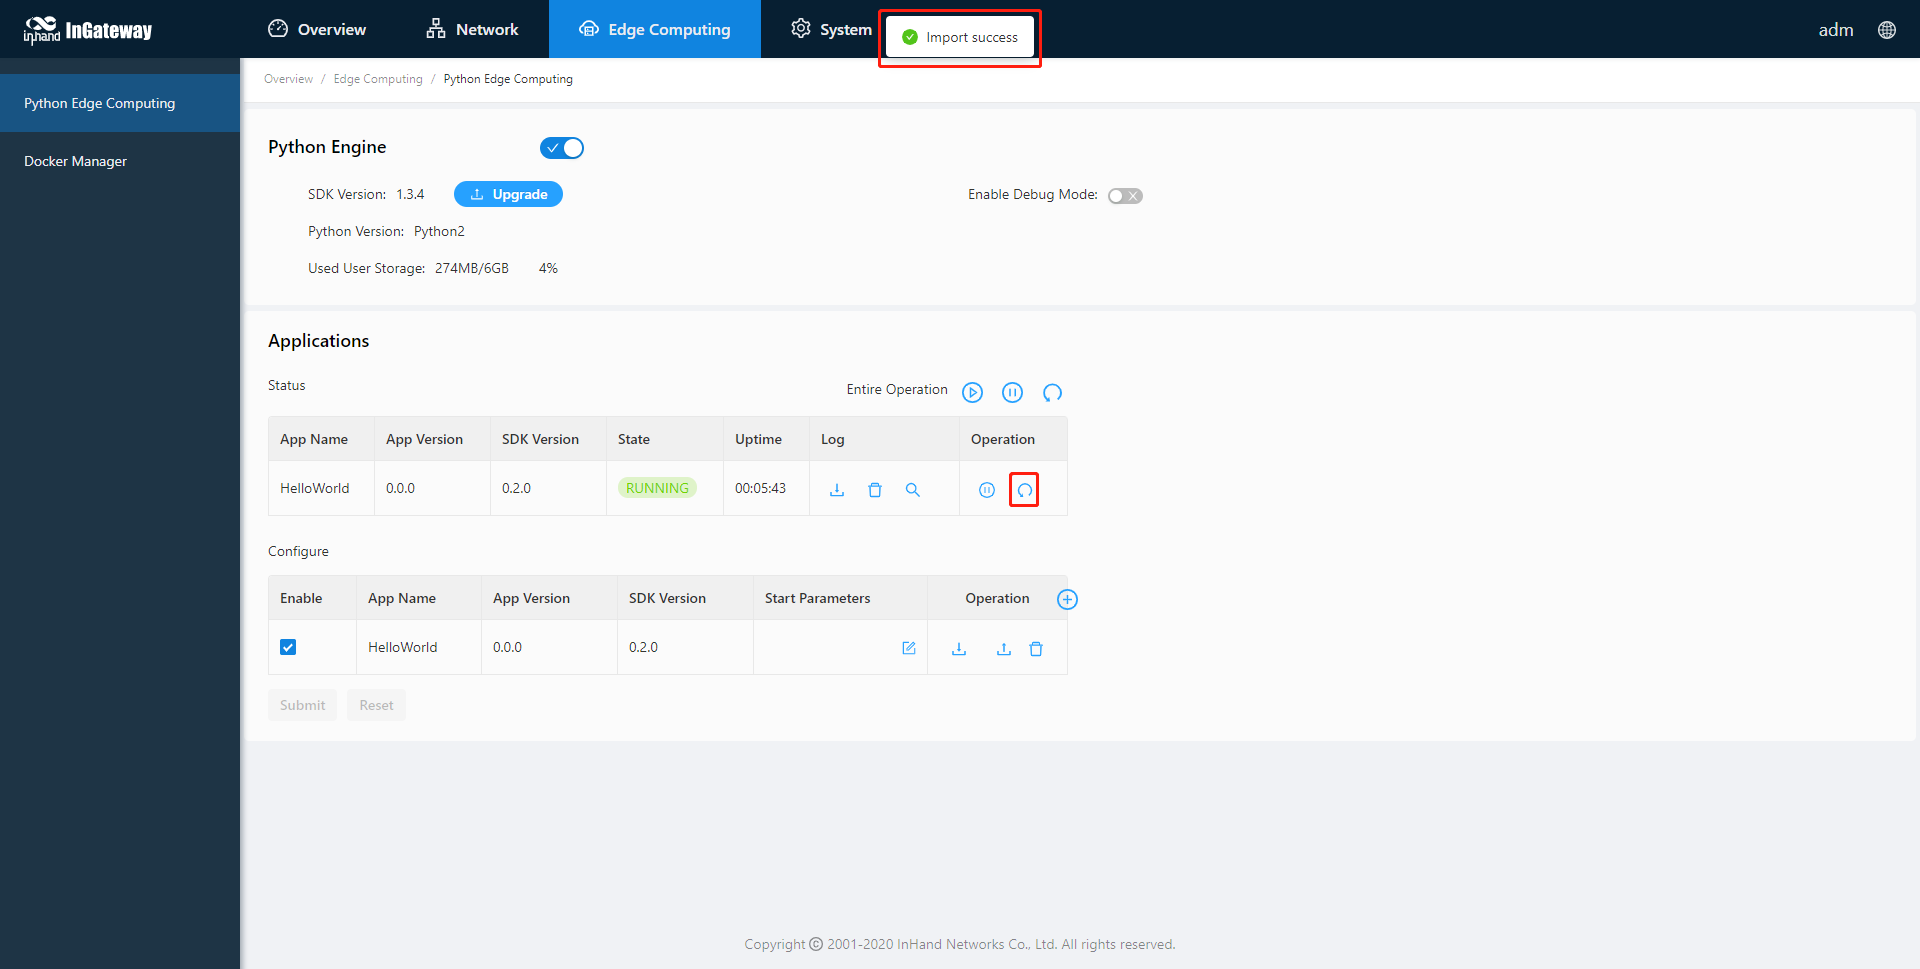
Step 2: Restart the App after the import is successful. After the App restarts, it will runing according to the imported configuration file.
3.3 Update Python App version
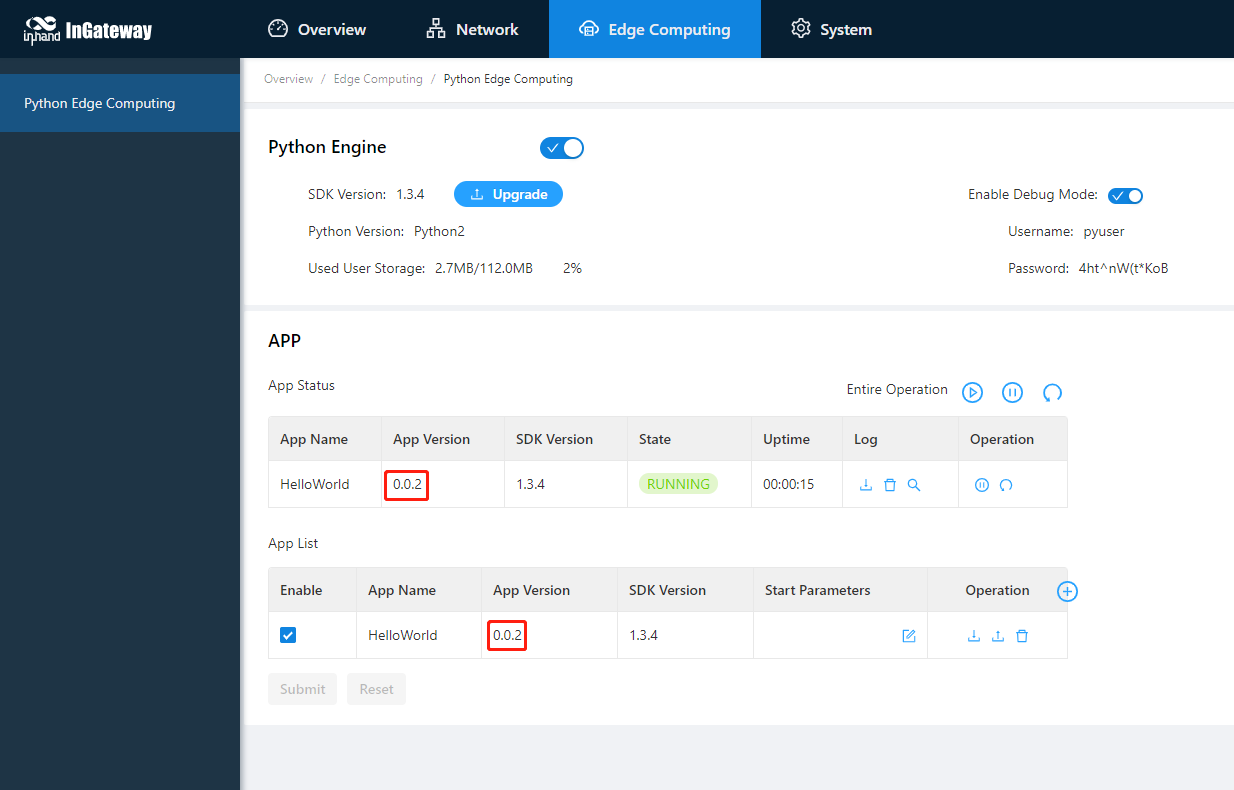
Generally, if you need to update the Python App version, you only need to import the new version of the App on the Edge Computing > Python Edge Computing page.
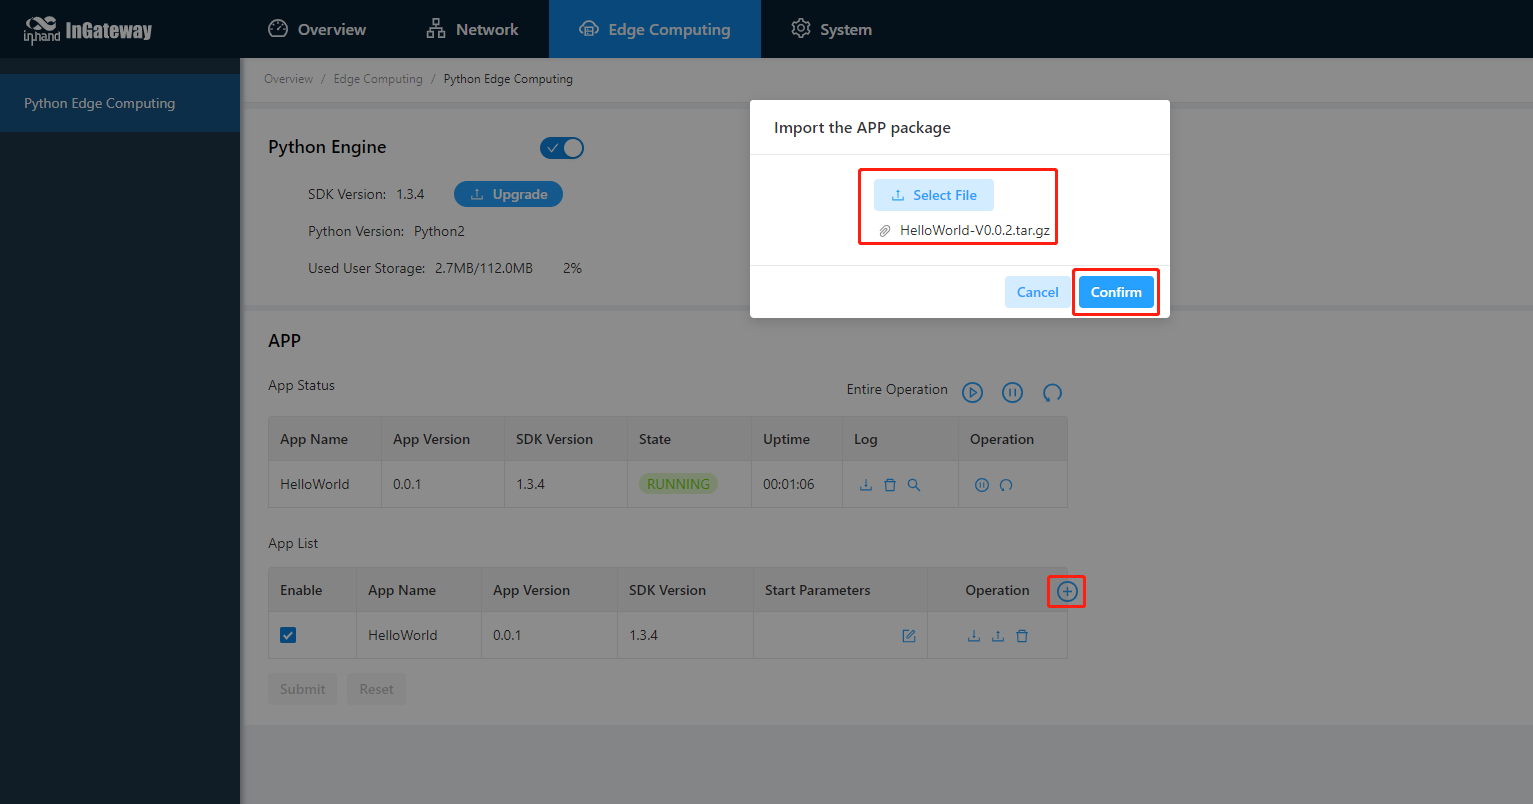
After the update is completed, as shown below:
3.4 Enable the Debug Mode
To run and debug Python code on IG501, you need to enable IG501’s debug mode. Choose Edge Computing > Python Edge Computing, select Enable Debug Mode. After enabling, you can develop IG501 through VS Code. How to use VS Code for Python development of IG501, please refer to Quick Start for MobiusPi Python Development.
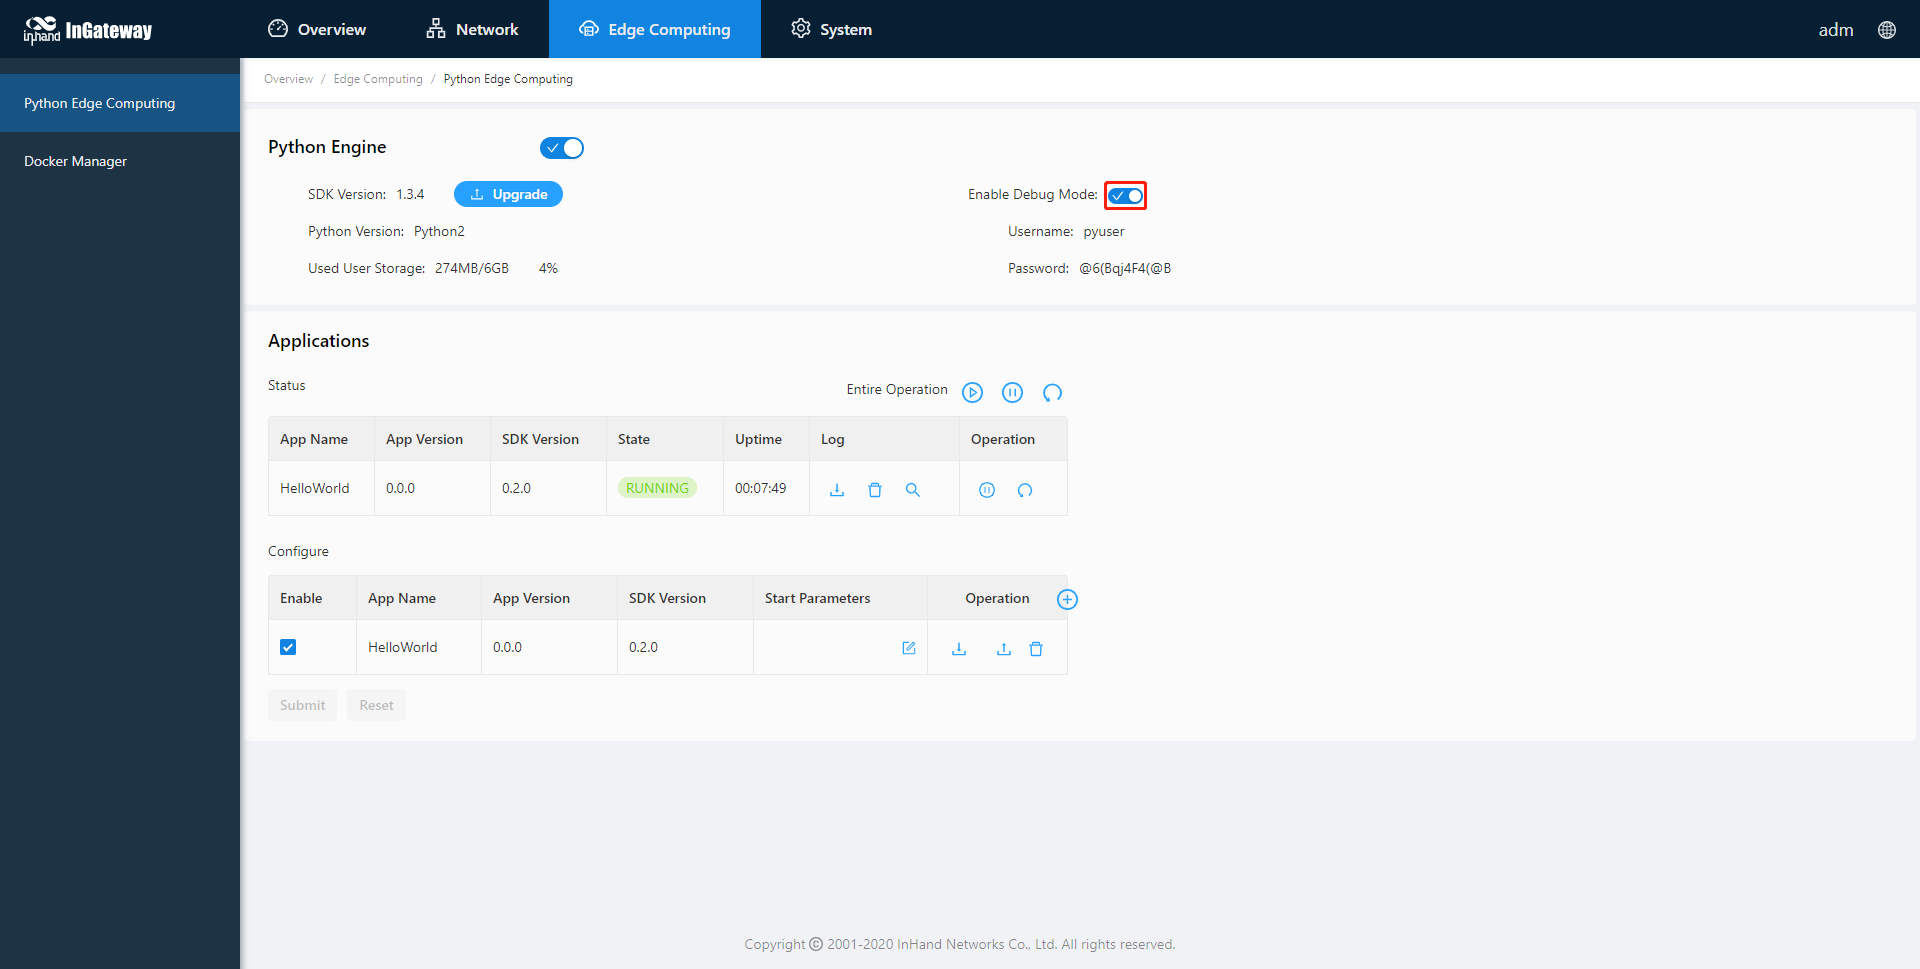
After the debugging mode is enabled, IG501 will start an SSH server to listen on port 222 of LAN (default IP address being 192.168.1.1). The user name and password of the SSH server are displayed on the previous web page. A random password is generated every time the debugging mode is enabled or the IG501 is restarted to ensure security.
4. Device Manager
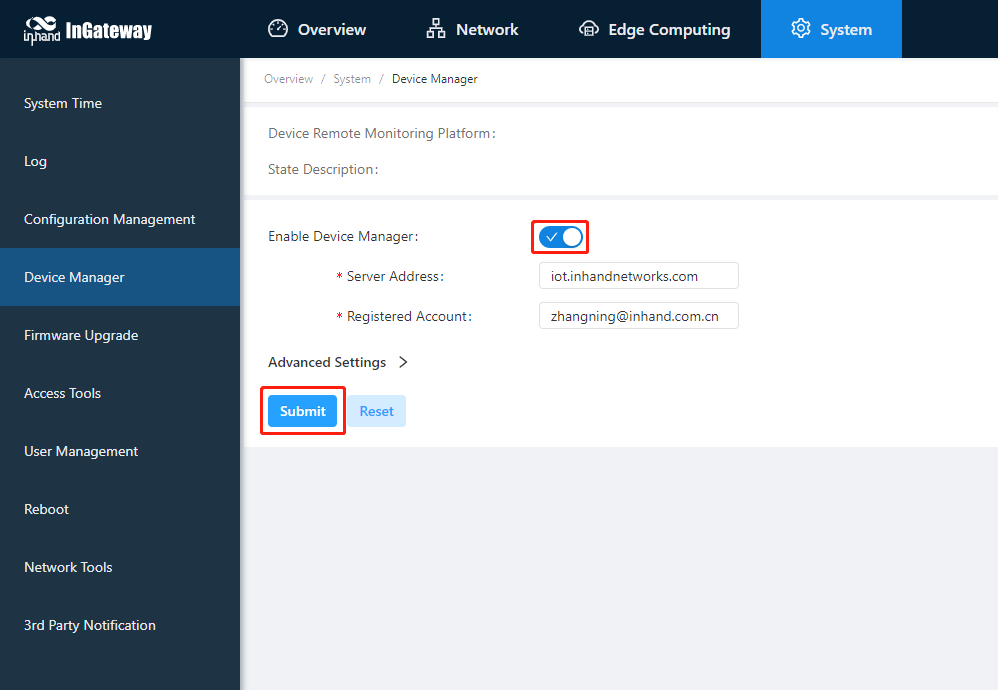
The Device Manager developed by InHand supports functions such as monitoring IG501 status, remote maintenance of equipment, remote batch delivery of IG501 configuration, and IG501 batch upgrade, helping users to conveniently and efficiently manage IG501 and field devices. In order to enable the Device Manager to remotely manage the IG501 and field devices, the IG501 needs to be connected to the cloud platform. The connection method is as follows:Choose System Management > Device Manager, tick Enable Device Manager and configure the corresponding server address and registered account, and click Submit after the configuration is complete.
- Server address: the address of the Device Manager. The address of the Device Manager developed by InHand is as follows:
- Domestic version Device Manager:
c.inhandcloud.com - Overseas version Device Manager:
iot.inhandnetworks.com - Domestic version InConnect:
ics.inhandiot.com - Overseas version InConnect:
ics.inhandnetworks.com
- Domestic version Device Manager:
- Registered account: the Device Manager account associated with the IG501 device (if you have not registered an account, you need to register an account first)
- Advanced settings: Contains configurations such as heartbeat interval. Generally, you can use the default configuration.
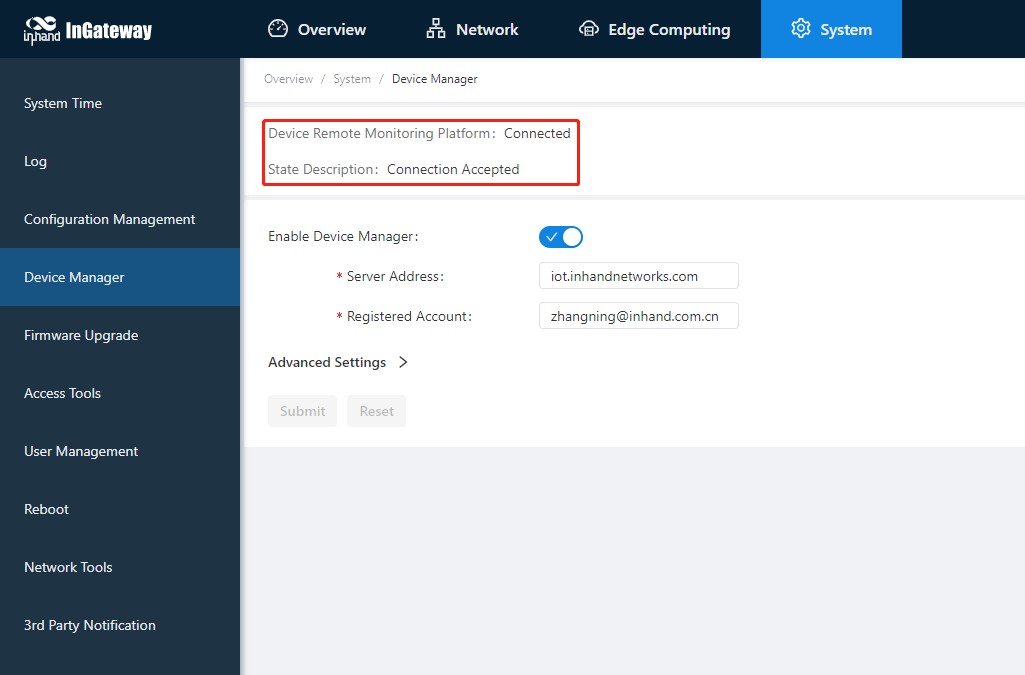
After the IG501 is successfully connected to the Device Manager, the status is described as Connection Accepted.
Appendix
Factory reset
There are two ways to restore the IG501 to factory settings: hardware factory reset and software factory reset.
Hardware factory reset
- Step 1: Find the RESET button on the operation panel;
- Step 2: Hold down the RESET button within 10s after the device is powered on;
- Step 3: When the WARN indicator turns yellow, release the RESET button;
- Step 4: After a few seconds, when the WARN indicator turns off, hold down the RESET button again;
- Step 5: When you see the WARN indicator blink, release the RESET button. After a while, the WARN indicator turns off, the factory settings of the device have been restored.
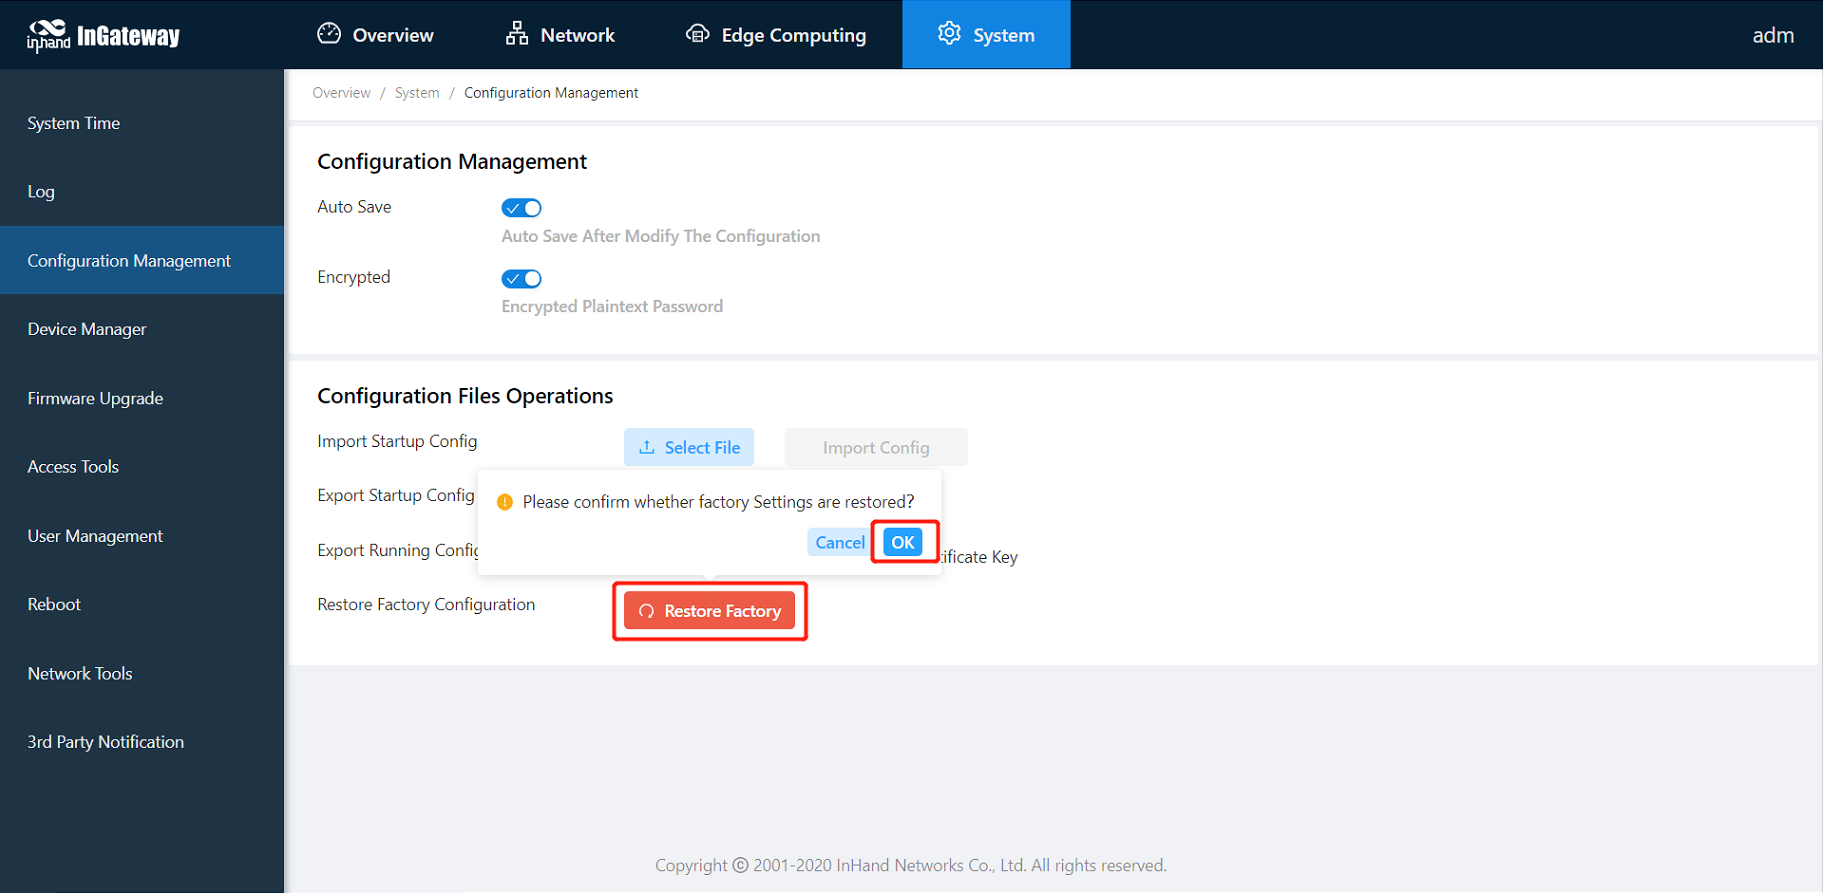
Software factory reset
Choose System Management > Configuration Management, click the reset button and select OK. IG501 will complete the factory reset operation by itself.